
Ever look at a beautifully stained piece of wood and think, “Yeah, I could totally do that”? Yeah, me too. Spoiler: I was wrong—at least at first.
Welcome to my slightly chaotic but deeply fulfilling journey into the world of wood stain. Whether you’re restoring a thrifted side table or debating the perfect walnut hue for your new shelves, this post is for you. It’s part diary, part how-to, and hopefully a little bit of inspiration sprinkled on top.
Let’s grab our brushes (or rags… or foam pads—more on that later) and get into it.
What Is Wood Stain, Really?
So, lets begin on the very beginning: What even is timber Wood Stain? No, its now no longer paint. No, its now no longer varnish. Its extra like… timber make-up with dedication issues. It soaks into the grain and complements the herbal appearance instead of protecting it up.
There are a few types:
- Oil-based stain: Deep color, long drying time. Classic choice.
- Water-based stain: Quicker drying, easier cleanup. Less smell (a win for noses).
- Gel stain: Thick, like pudding. Great for vertical surfaces or uneven woods.
Each has its personality—kind of like dogs, but less drooly.
Why Wood Stain Matters More Than You Think
Staining isnt pretty much converting color. Its approximately revealing character. Wood stain brings out that dreamy grain sample and provides warm temperature or depth, relying in your vibe.
You need rustic farmhouse charm? Go with a warm, weathered oak. Sleek and modern? Try an coffee or black Wood Stain. Mid-century minimalism? Natural tones are your BFFs.
Choosing the proper stain can absolutely extrade the temper of your room. It`s indoors layout magic with a DIY wand.
My First Staining Adventure
Ah yes, the DIY catastrophe that commenced it all. I sold this $15 stop desk off Facebook Marketplace, and I changed into feeling so smug. I sanded it down (type of), slapped on a darkish walnut stain (a number of it), and then… catastrophe.
It changed into blotchy. Sticky. Uneven. Kind of purple?? I panicked. Googled furiously. Called my dad. Then panicked a few greater.
Eventually, I discovered the magic of prepping the wood (greater on that soon), and sanding it go into reverse have become my weekend therapy. I earned each little bit of that faultless finish—and a newfound recognize for anybody who does this professionally.
Choosing the Right Wood for Staining
Not all woods are created equal when it comes to staining. Some are naturally rebellious.
Great woods for staining:
- Oak (white or red) – accepts stain like a dream
- Ash – smooth grain, deep color payoff
- Walnut – naturally beautiful, even without stain
Problematic woods:
- Pine – gets blotchy without pre-treatment
- Maple – doesn’t absorb evenly
- Birch – unpredictable results
If you’re a beginner, I recommend sticking with oak. It’s forgiving, like a patient older sibling.
Prepping Like a Pro
This part is unsexy, but vital. Skipping prep is like putting on foundation without washing your face. Here’s what you need to do:
- Sanding: Start coarse (around 80 grit), then work your way to 120 or even 220 grit. Smooth is the goal, but don’t polish too much or the stain won’t penetrate.
- Clean off dust: Use a tack cloth or damp rag. Your stain deserves a clean stage.
- Conditioner (for softwoods): Helps prevent blotching. Especially helpful with pine and birch.
Put on a podcast, get in the zone, and trust me—it’s worth it.
Picking the Perfect Wood Stain Color
This part is so fun—and stressful. My advice? Don’t pick a color at the store based on the can lid. Test it. Always.
Consider:
- Your home’s lighting (natural light makes stains look lighter)
- The surrounding decor tones
- The wood species (same stain looks different on pine vs. oak)
Trendy colors right now? Think:
- Driftwood gray (coastal, modern)
- Espresso (dark and dramatic)
- Golden pecan (warm and sunny)
Do a few test patches. You’ll thank yourself later.
Oil-Based vs. Water-Based vs. Gel: Which Should You Use?
Each Wood Stain type has pros and cons, depending on your project and personality.
Oil-based: Rich tones, long working time. Great for indoor furniture. Smells strong though—ventilation is key.
Water-based: Dries fast, eco-friendlier. Easier cleanup. Slightly less rich color but still solid.
Gel: Thick and sits on top more than soaking in. Great for vertical surfaces or when you want more control.
My favorite? Oil-based for major pieces, water-based for quick jobs, and gel when I’m feeling experimental.
The Tools of the Trade
Time to assemble your DIY toolkit.
What you’ll need:
- Foam brushes (great for even application)
- Lint-free cloths (old t-shirts work)
- Gloves (or your hands will look like tree bark)
- Stir sticks (always stir, never shake)
Avoid:
- Cheap bristle brushes (they shed like my cat)
- Sponges from your kitchen (learned that one the hard way)
- Impatience (seriously)
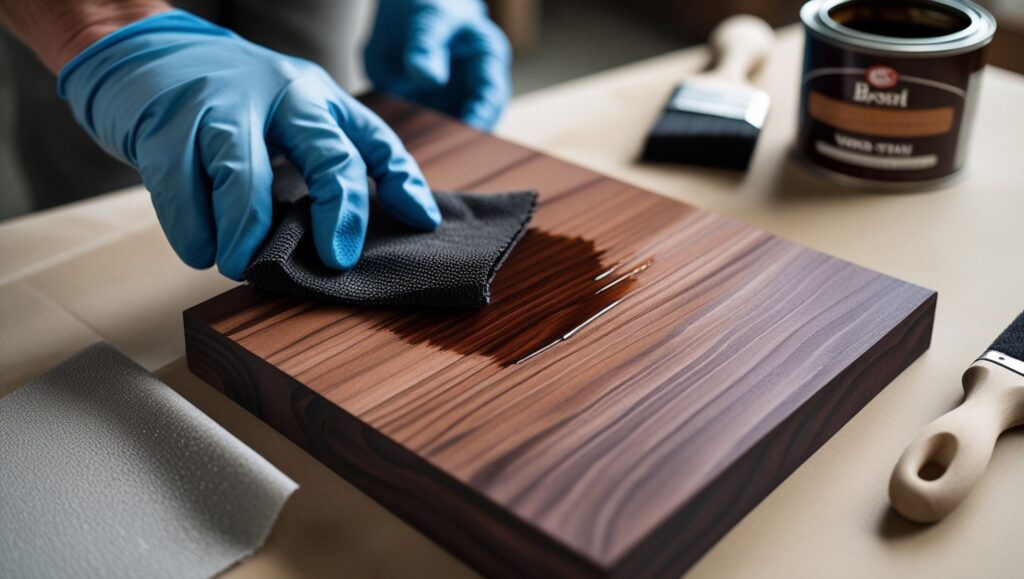
Applying Wood Stain Like a (Semi) Pro
Now the fun begins. Here’s how to do it:
- Dip your cloth or brush and apply in the direction of the grain.
- Work in manageable sections.
- Let the stain sit for 5–15 minutes depending on depth of color desired.
- Wipe off excess with a clean cloth.
Don’t panic if it looks streaky at first—let it dry fully before judging. Trust the process.
How Long Should You Let It Sit?
There’s no one-size-fits-all answer, but here’s a quick cheat sheet:
- For lighter tones: Wipe after 2–5 minutes
- For deeper color: Wait 10–15 minutes
- Never let it dry completely before wiping—or you’re in for a sticky nightmare
Temperature and humidity matter too. It’s a delicate dance of timing and judgment.
Second Coats, Layering, and Getting That Deep Look
Want a richer color? Go for a 2nd coat. Just ensure the primary one is absolutely dry (like in a single day dry, not “contact dry”).
Pro tip: You may even layer extraordinary Wood Stains for custom tones. I as soon as layered weathered grey over conventional oak, and it seemed like some thing immediately out of a high-give up catalog. Happy injuries are a lovely thing.
Sealing the Deal: Topcoats & Finishes
Once you’ve nailed the stain, you’ll want to protect it.
Top choices:
- Polyurethane (oil or water-based): Super durable, shiny or matte
- Lacquer: Smooth and fast-drying
- Wax: Soft glow, needs more maintenance
I usually go with water-based polyurethane—it’s low-odor and tough enough to withstand coffee mug rings (ask me how I know).
Fixing Mistakes Without Losing Your Mind
Made a mess? Been there.
Here’s what to do:
- Blotchy areas: Try sanding just the spot and reapplying stain
- Too dark? Light sanding and a coat of lighter stain
- Uneven color? Consider a gel stain to even things out
Worst case scenario? Strip it down and start over. It hurts, but it’s not the end of the world.
My Favorite Wood Stain Projects
My absolute favorite? A $25 dining table flip. I stripped off years of orange varnish, stained it with a deep espresso, and sealed it with satin poly. It looked like something from West Elm, and I only spent $60 total.
Other hits:
- A floating shelf stained golden oak
- A mid-century dresser refresh
- Wooden plant stands with layered stain
Each one taught me something new—and gave me a reason to go back to the hardware store (my happy place).
Trends in Wood Stain Right Now
If you’re a trend-chaser (guilty), here’s what’s hot in 2025:
- Natural finishes: Minimal stain or whitewash, showing off the grain
- Warm neutrals: Sand, honey, and wheat tones
- Japandi vibes: Muted woods with a clean aesthetic
- Two-tone pieces: Stained top with painted legs
Instagram and Pinterest are great places to get inspired (and overwhelmed).
Wood Stain on a Budget
Staining doesn’t have to break the bank. Here’s how I keep costs low:
- Buy sample sizes: A little goes a long way
- Repurpose old furniture: One person’s trash is your next weekend project
- Check the “Oops” section: Hardware stores often have discounted mis-tints
Brands I love: Minwax, Varathane, and General Finishes. Affordable, reliable, and beginner-friendly.
Final Thoughts: Why I Love the Wood Stain Life
At the stop of the day, staining wooden isnt pretty much aesthetics. Its therapy. Its transformation. Its a weirdly gratifying manner to spend a Sunday.
Ive stained tables, shelves, trays, boxes, and my personal hands. And Im now no longer performed yet.
So if youre soaring withinside the wooden stain aisle, questioning if its really well worth it—move for it. Worst case? You sand it down and attempt again. Best case? You create some thing lovely that smells barely like mineral spirits.
Conclusion
Wood stain is sort of a relationship: it calls for attention, patience, and every now and then a entire do-over. But while it works, it honestly works. So embody the sawdust, roll up your sleeves, and stain something. Just perhaps don`t begin with the heirloom rocking chair.
FAQs
Can you stain over painted wood?
Not directly. You’ll need to strip or sand the paint off first. Stain needs bare wood to work its magic.
What’s the best stain for outdoor furniture?
Oil-based stain with a good exterior sealant. Look for UV and water-resistant options.
How long does wood stain need to dry before sealing?
Typically 24–48 hours. If it still feels tacky, wait. Patience pays.
Should I sand between coats of stain?
Usually no, but you can lightly sand before your topcoat for a smoother finish.
Can you mix two different stain colors?
Absolutely! Test your mix on scrap wood first. Custom colors can be a game-changer.